This blog is to provide a forum for students enrolled in Systems Management Course at IIIT-Delhi to have a meaningful discussion related to the course.
Monday, 3 October 2011
SERIAL PORT COMMUNICATION
Serial communication is a popular means of transmitting data between a computer and a peripheral device such as a programmable instrument or even another computer. All computer operating systems in use today support serial ports, because serial ports have been around for decades. Parallel ports are a more recent invention and are much faster than serial ports. USB ports are only a few years old, and will likely replace both serial and parallel ports completely over the next several years.
The name "serial" comes from the fact that a serial port "serializes" data. That is, it takes a byte of data and transmits the 8 bits in the byte one at a time. The advantage is that a serial port needs only one wire to transmit the 8 bits (while a parallel port needs 8). The disadvantage is that it takes 8 times longer to transmit the data than it would if there were 8 wires. Serial ports lower cable costs and make cables smaller.
Before each byte of data, a serial port sends a start bit, which is a single bit with a value of 0. After each byte of data, it sends a stop bit to signal that the byte is complete. It may also send a parity bit.
Serial ports, also called communication (COM) ports, are bi-directional. Bi-directional communication allows each device to receive data as well as transmit it. Serial devices use different pins to receive and transmit data -- using the same pins would limit communication to half-duplex, meaning that information could only travel in one direction at a time. Using different pins allows for full-duplex communication, in which information can travel in both directions at once.
Figure 1: 1: RS-232 Instrument,2: RS-232 Cable, 3:Serial Port
Serial communication requires that you specify the following four parameters:
The baud rate of the transmission
The number of data bits encoding a character
The sense of the optional parity bit
The number of stop bits
Each transmitted character is packaged in a character frame that consists of a single start bit followed by the data bits, the optional parity bit, and the stop bit or bits. The figure below shows a typical character frame encoding the letter m.
Serial ports rely on a special controller chip, the Universal Asynchronous Receiver/Transmitter (UART), to function properly.
The external connector for a serial port can be either 9 pins or 25 pins. Originally, the primary use of a serial port was to connect a modem to your computer. The pin assignments reflect that. Let's take a closer look at what happens at each pin when a modem is connected.
9-pin connector:
1. Carrier Detect - Determines if the modem is connected to a working phone line.
2. Receive Data - Computer receives information sent from the modem.
3. Transmit Data - Computer sends information to the modem.
4. Data Terminal Ready - Computer tells the modem that it is ready to talk.
5. Signal Ground - Pin is grounded.
6. Data Set Ready - Modem tells the computer that it is ready to talk.
7. Request To Send - Computer asks the modem if it can send information.
8. Clear To Send - Modem tells the computer that it can send information.
9. Ring Indicator - Once a call has been placed, computer acknowledges signal (sent from modem) that a ring is detected.
25-pin connector:
1. Not Used
2. Transmit Data - Computer sends information to the modem.
3. Receive Data - Computer receives information sent from the modem.
4. Request To Send - Computer asks the modem if it can send information.
5. Clear To Send - Modem tells the computer that it can send information.
6. Data Set Ready - Modem tells the computer that it is ready to talk.
7. Signal Ground - Pin is grounded.
8. Received Line Signal Detector - Determines if the modem is connected to a working phone line.
9. Not Used: Transmit Current Loop Return (+)
10. Not Used
11. Not Used: Transmit Current Loop Data (-)
12. Not Used
13. Not Used
14. Not Used
15. Not Used
16. Not Used
17. Not Used
18. Not Used: Receive Current Loop Data (+)
19. Not Used
20. Data Terminal Ready - Computer tells the modem that it is ready to talk.
21. Not Used
22. Ring Indicator - Once a call has been placed, computer acknowledges signal (sent from modem) that a ring is detected.
23. Not Used
24. Not Used
25. Not Used: Receive Current Loop Return (-)
Voltage sent over the pins can be in one of two states, On or Off. On (binary value "1") means that the pin is transmitting a signal between -3 and -25 volts, while Off (binary value "0") means that it is transmitting a signal between +3 and +25 volts...
Managing Serial Ports in Windows
USB Cables and Connectors
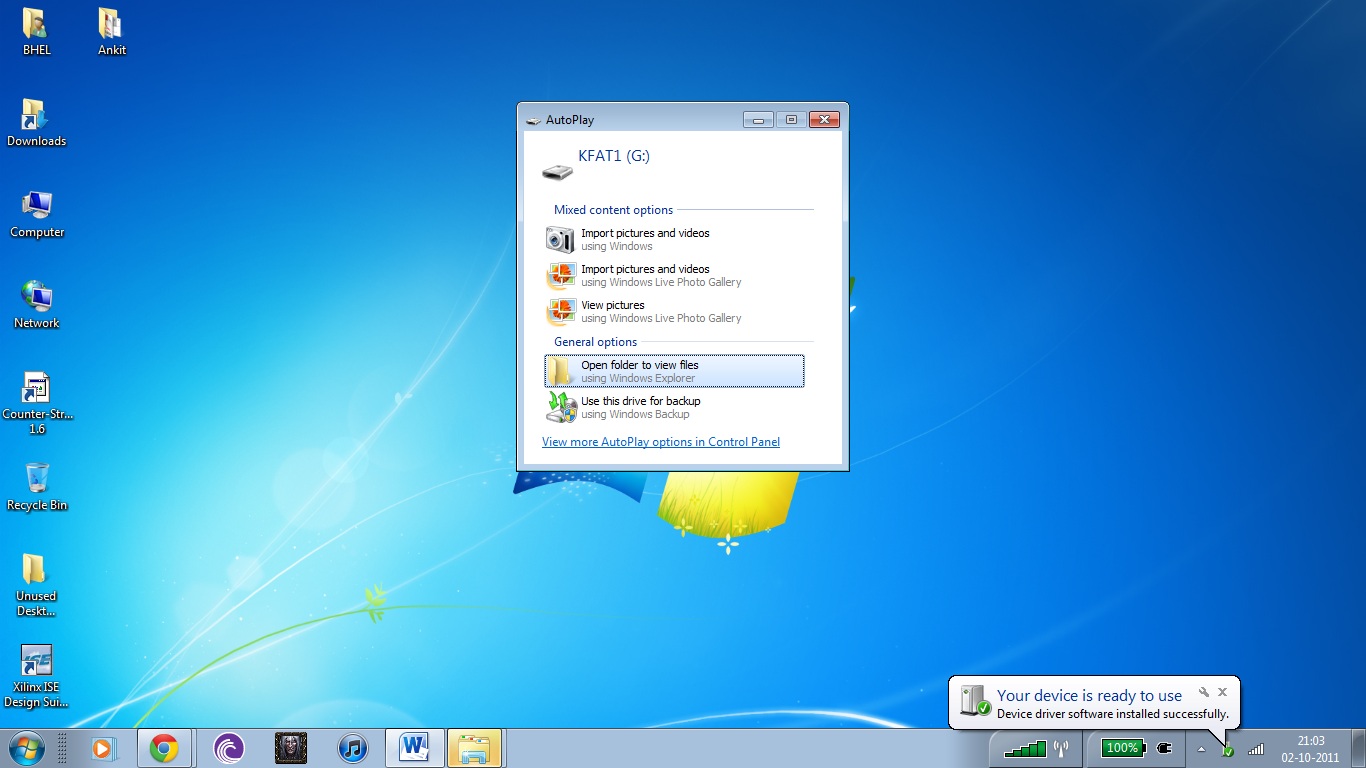
Connecting a USB device to a computer is simple -- you find the USB connector on the back of your machine and plug the USB connector into it.
If it's a new device, the operator system auto-detects it and asks for the driver disk. If the device has already been installed, the computer activates it and starts talking to it. USB devices can be connected and disconnected at any time.
Discovering External Serial Ports
To check which all serial ports are connected to the computer, go to Start Menu
Then click on Devices and Printers and then select any one and view its properties.
Now to discover an External Serial Port, go to Control Panel and then select DEVICE MANAGER.
You will find a list which will have information about interfaces, biometrics, Disk Drives and COM & LPT ports as well.
Expand COM Ports option and right click on any of the serial port connections and view its properties.
In my case I have joined my SAMSUNG android phone to my computer.
You can also fiddle with its parameters in port settings by changing its Baud Rate, Data Bits, Parity and Stop Bit which will change the device’s behaviour or performance.
Click on Advanced and it will show Receive and Transmit buffer and also to which COM port it is joined to. You can also change its COM number.
LINUX
Linux offers various tools. Linux uses ttySx for a serial port device name. For example, COM1 (DOS/Windows name) is ttyS0, COM2 is ttyS1 and so on
Finding serial ports
Serial ports appear in Linux as device files, which means you can access them
conviniently with same command as e.g. text files.
1. Normal serial ports appear as /dev/ttyS#, so first is /dev/ttyS0, second
/dev/ttyS1 and so on.
2. USB to serial adapters should work out of the box (from kernel 2.4 on I think)
without any extra drivers and they appear as /dev/ttyUSB# ie. /dev/ttyUSB0
2 Serial port settings
Serial port settings can be changed using stty command. (See ”man stty”)
Example: Set serial port /dev/ttyS0 baud rate to 57600 and odd parity
stty -F /dev/ttyS0 57600 parodd
3 Reading from and writing to serial port
You can send commands to serial port using command echo:
echo "command" > /dev/ttyUSB0
And read data from serial port using cat :
cat /dev/ttyUSB0
redirect output to a file:
cat /dev/ttyUSB0 > file.txt
Task: Display Detected System's Serial Support
Simple run dmesg command $ dmesg | grep tty
setserial command
setserial is a program designed to set and/or report the configuration information associated with a serial port. This information includes what I/O port and IRQ a particular serial port is using, and whether or not the break key should be interpreted as the Secure Attention Key, and so on. Just type the following command: $ setserial -g /dev/ttyS[0123]
setserial with -g option help to find out what physical serial ports your Linux box has
If Setserial is not installed then one can type
$ Sudo apt-get install setserial
Get it installed and then can further perform functions
Linux serial console programs
Once serial ports identified you can configure Linux box using various utilities:
1. minicom- The best friendly serial communication program for controlling modems and connecting to dump devices
After the BIOS completes the POST successfully, It transfers the control to the MBR (Master boot record). MBR is the 512 bytes on the first sector of the device in which it is stored(eg Hard Disk). It's first 446 bytes store the first stage of the bootloader, the next 64 bytes contain the partition table for the device. The 2 bytes in the end a are used for other purposes.
A bootloader is a software that boots an operating system. The first stage of the bootloader (Initial Program Loader) contains the location of the second stage of the boot loader, which is stored in the hard disk, and transfers control to it..
Installing and Recovering GRUB(Grand Unified Boot loader):
While working with bootloaders, you often come across a situation when your computer is unbootable, Here is how you recover MBR by installing grub(assuming you have a linux partition already installed!).
You will need a linux distribution stored in a livecd, or a pen drive, and boot from it.
open the terminal and execute:
sudo fdisk -l
fdisk is the partition table manipulator, we are using fdisk -l, which lists the partition table for all devices.
Before trying to install a bootloader, It is very important to understand this partition table. I have two storage devices working on the computer - Hard disk and a pendrive
Which Disk is /dev/sda? Since I know the size of my hard drive and the partitions I made - So I can easily guess it is my Hard Drive.
I have 3 partitions which are formatted as NTFS - A windows filesystem. The 2 large ones - /dev/sda2 and /dev/sda4 are my windows C:/ and D:/ ( I can easily make out since I am the one who partitioned them)
What is stored in the smallest NTFS partition /dev/sda1? This is where the windows bootloader - Windows Boot Manager is stored ( Is it possible to have multiple bootloaders?)
The disk /dev/sdb is my pendrive, from which I am booting ubuntu. Since my pendrive is bootable, It also has it's own bootloader whose second stage looks something like:
This bootloader is stored on /dev/sdb1 along with the version of ubuntu stored in the pen drive
Now you have a good idea what these partitions mean, we can go ahead and install grub,
Installing grub is easy, you simply need to run:
sudo grub-install /dev/sda
Here /dev/sda is the device you are installing it for.
We get an error:
Remember, I am booting ubuntu's live image, and I have a version of ubuntu installed on the hard disk, which I cannot access, since my bootloader has crashed.
Now, I am using a terminal whose root is that of the live image, not the linux which is installed on the computer.
Therefore, install-grub it tries to install it into the live image, which is read-only and I get this error.
I want to install grub in my ubuntu partition, which is /dev/sda5. Now the next question comes, how do I make changes in the linux partition stored in the hard drive from my live cd?
For this we use mount command to attach the linux partition into the live cd,
sudo mount /dev/sda5 /mnt
It mounts the linux partition as read-writable, so I can actually have an affect on it,
Next I execute,
sudo mount /dev/sda5 /mnt/boot
Now I need to do another thing, make the /dev folder accessible in /mnt folder.
sudo mount --bind /dev /mnt/dev
--bind makes the same contents is accessible in two places. I kept on getting errors since I skipped this step, so make sure you don't.
What was the purpose of the above 3 commands?
You will notice /mnt now resembles the root of my the ubuntu stored in my hard drive, The purpose was to mirror /mnt folder of the live cd, into the root of the stored ubuntu. Why I did this will be clear in the next step..
I temporarily make the /mnt folder root using chroot command
sudo chroot /mnt
Now execute ls and surprise! you are now accessing the root folder of the linux distribution stored in your hard drive, (in my case ubuntu) from within the live image, and can now make changes to it.
Go ahead and try out the first command,
sudo grub-install /dev/sda
And reboot to find the Grub splash screen, waiting for you.
Short form - Simply all the commands you need to run to install grub from the live image
boot using usb/livecd and open terminal
sudo fdisk -l
sudo mount /dev/sda* /mnt
sudo mount /dev/sda* /mnt/boot
sudo mount /dev /mnt/dev
sudo chroot /mnt
sudo grub-install /dev/sda
exit
sudo reboot
* stands for the linux partition number, which you find using fdisk -l
Configuring Grub:
Grub stores its menu information in the file /boot/grub/grub.cfg which is not meant to be edited!
The file which we edit is /etc/default/grub and then we run:
sudo update-grub
which incorporates the changes we made into grub.conf file, now run
sudo gedit /etc/default/grub
I have explained some of the entries we tested:
# If you change this file, run 'update-grub' afterwards to update # /boot/grub/grub.cfg. # For full documentation of the options in this file, see: # info -f grub -n 'Simple configuration'
GRUB_DEFAULT=0
# Used to set the default menu entry(corresponding to grub.cfg)
#GRUB_HIDDEN_TIMEOUT=0
# Controls how long a blank screen in displayed, before showing the grub menu
GRUB_HIDDEN_TIMEOUT_QUIET=true
# False will display a countdown
GRUB_TIMEOUT=10
# Seconds grub waits before booting the default entry GRUB_DISTRIBUTOR=`lsb_release -i -s 2> /dev/null || echo Debian`
GRUB_CMDLINE_LINUX_DEFAULT="quiet splash"
# Controls the splash image when linux processes are taking place, replacing it with "splash" generates a splash image in the background of running processes GRUB_CMDLINE_LINUX="" # Entries mentioned here are added to the linux command line, which are executed while booting, this is used to pass parameters to the kernel # Uncomment to enable BadRAM filtering, modify to suit your needs # This works with Linux (no patch required) and with any kernel that obtains # the memory map information from GRUB (GNU Mach, kernel of FreeBSD ...) #GRUB_BADRAM="0x01234567,0xfefefefe,0x89abcdef,0xefefefef"
# Uncomment to disable graphical terminal (grub-pc only) #GRUB_TERMINAL=console
# The resolution used on graphical terminal # note that you can use only modes which your graphic card supports via VBE # you can see them in real GRUB with the command `vbeinfo' #GRUB_GFXMODE=640x480
# Uncomment if you don't want GRUB to pass "root=UUID=xxx" parameter to Linux #GRUB_DISABLE_LINUX_UUID=true
# Uncomment to disable generation of recovery mode menu entries #GRUB_DISABLE_RECOVERY="true"
# Uncomment to get a beep at grub start #GRUB_INIT_TUNE="480 440 1"
To make changes permanent, run the previous command after saving the file
sudo gedit /etc/default/grub
and reboot to see them in action.
When grub is installed, it automatically reads the patition table and looks for all linux kernels and operating systems present, and adds them to the configuration file. It is possible to add custom entries, and remove existing entries,
To add a custom entry to the grub menu, we have to create a custom file in /etc/grub.d/ (The name of the file, decides it's order in the menu), we edited the custom file 40_custom
the first 2 lines must be
#!/bin/sh
exec tail -n +3 $0
I have installed an os on /dev/sda5 and I want to chainload it,
I will create the lines:
menuentry "Sample OS" {
set root=(hd0,5)
chainloader +1
}
We found out that an easy way to add custom images is to copy an entry from grb.cfg and manually edit it.
Now I need to make this file executable, I will use the chmod command:
sudo chmod +x /etc/grub.d/40_custom
Now I run
sudo update-grub
Which automatically updates grub.cfg with the sample OS i created, and the next time I reboot, I get
To remove a grub entry, we simply do the reverse, we remove it from /etc/grub.d folder, and run update-grub.
Installing and configuring Lilo (Linux Loader):
open the terminal, and run
sudo apt-get install lilo
sudo liloconfig
follow the onscreen instructions and chose the default settings, which generates the default lilo configuration file,
you have to edit it using:
sudo gedit /etc/lilo.conf
Since every system is different, The configuration file for them will be different.Be careful, one wrong command in its configuration would result in your partition tables getting messed up, and you would have to recover the bootloader, and in some cases, reinstall the operating system.
Here is what my default configuration file looked like after removing the comments:
What each part of the code does is explained in the comments, when the file is generated.
I'll highlight what are the important components are, which you need to make necessary changes in the system:
boot=Variable specifies where to install lilo, It can be installed in the boot sector your linux partition, or the master boot record of the hard drive, in which case, we set it to /dev/sda.
root= specifies where the root filesystem is, It is the root of your linux partiton, in my case /dev/sda6
delay=specifies the amount of time(In tenths of a second) lilo waits before it loads the first image timeout=specifies the amount of time(In tenths of a second) lilo waits before it loads the default image
The default image is specified by using, default=
map=points to the boot map file automatically generated by LILO and is used internally.
image=specifies the linux kernel to boot,arguments (linux 1 to go into single user mode, it will ask for the password)
label=decides its label in the lilo menu
initrd=specifies the path of the initial ram disk image of the image
read only tells the kernel to mount the filesystem as read-only, It is remounted later as readwrite, this is how linux is to be booted by default.
This is the default set up, Now for the changes we made:
You will notice, there is no option to boot windows, we achieve this by a process called chain loading, where the second stage of a bootloader redirects to the second stage of another bootloader.
we add the lines:
other=/dev/sda1
label="Windows 7"
We know that the windows 7 loader was stored in /dev/sda1, these 2 lines simply creates another option named Windows 7 in the menu, which redirects us to the Windows Boot Manager stored in /dev/sda1
Suppose we had another linux based os stored in the bootable partition /dev/sda7 having its own bootloader stored in the same partition, we could have set up a triple boot by using the other command again,
other=/dev/sda7
label=linux
this would chainload the boatloader in /dev/sda7
suppose we knew where the kernel image of this linux was stored, we could have booted it directly from lilo using the image= command.
image=/boot/Image
label=linux
initrd=/boot/initialramdiskimage
read-only
This way we can boot more than two operating systems.
Another important step was securing Lilo,
By default Lilo allows anyone to boot into single user mode by pressing init 1 in the lilo prompt( runlevel 1 allows anyone to give root commands without needing a root password)
so we need to password protect the bootloader, this is achieved by adding the line
password=
We can also secure our boot images with a password, by adding a password= line below the image=line, along with a mandatory/restricted line
image=/boot/vmlinuz-2.6.38-8-generic
password=
restricted
label="Lin 2.6.38img0"
initrd=/boot/initrd.img-2.6.38-8-generic
read-only
mandatory always asks for the password, while restrict only asks if you try to boot it with extra arguments (linux 1 to go into single user mode)
We found out that having a pendrive inserted conflicts with the lilo installation, so we had to add a line which made lilo ignore the device( /dev/sdb)
disk=/dev/sdb inaccessible
After editing the conf file, which looked like
boot=/dev/sda
root=/dev/sda6
bitmap=/boot/debian.bmp
bmp-colors=10,0,,7,0,
bmp-table=16,12,1,12,16
bmp-timer=34,28,13,0,
install=bmp
prompt
timeout=50
large-memory
map=/boot/map
vga=normal
disk=/dev/sdb inaccessible
image=/boot/vmlinuz-2.6.38-8-generic
password=persistent
restricted
label="Ubuntu 11.04"
initrd=/boot/initrd.img-2.6.38-8-generic
read-only
image=/boot/memtest86+.bin
label="Memory Test+"
read-only
other=/dev/sda1
label="Windows 7"
we installed lilo by running:
sudo lilo
in the terminal,
which will replace the MBR with lilo, provided your config file is correct, and become the default bootloader,
The next time we booted up our computer, we were greeted with,
Grub vs Lilo - our personal experience
We found Grub much smarter and easy to use than Lilo,
Lilo stores its information in the MBR. This is why if we add an os , the stage 1 Lilo bootloader has to be manually overwritten, which is risky because a faulty Lilo configuration file may leave the system unbootable.
Grub on the other hand, the other hand is very smart, it can read your partition tables and generates its configuration file taking them into account. It can be installed in a linux partition(It does not need to rewrite the MBR). It's installation is simple and easy , we never ran across an error when installing it.
An interesting feature about grub is that any changes you make into the grub configuration file is automatically taken into account the next time you restart your computer, while the changes in lilo.conf need to be written into the mbr, for which we have to install lilo again.
Grub also has a powerful command line interface( brought up by pressing 'c'), Lilo allows only one command.
Working with Windows bootloaders (A general idea):
Case-1 ( Windows versions uptill Windows NT and Windows Vista/7 installed)
If you choose Windows Vista/7, Windows Boot Manager starts winload.exe ( the bootloader of Windows Vista /7 ) to open Windows.
If you choose an Earlier Version Of Windows Windows Boot Manager starts NTLDR to open Windows.
Case-2 ( Ubuntu and Windows Vista/7 insatlled )
When Windows 7 is selected from the Boot Menu,then GRUB,GRUB2 or Lilo will call the Windows Boot Manager whcih will in turn call winload.exe.
Bcdedit is a powerful tool that Windows Vista and Windows 7 uses to manage the boot loader entries.
Click Start, click All Programs, and then click Accessories.
Right-click Command Prompt and then click Run As Administrator.
Type bcedit.exe
To view detailed information about using BCDEdit, run bcdedit /? from a command prompt.
Making changes to your BCD registry file can render your computer unbootable. Therefore, before making changes to your BCD registry file, you should make a backup copy, have a bootable Windows DVD available, and be prepared to restore the original BCD registry file. To make a backup of your current BCD registry, call the BCDEdit /export command, as shown here.
1.
bcdedit /export backupbcd.bcd
Later, you can restore your original BCD registry file by calling the BCDEdit /import command, as shown here.
bcdedit /import backupbcd.bcd
Note The file name and extension you use are not significant.
2.
The boot menu, by default, is displayed for 30 seconds if you have more than one boot menu entry. If you have only one boot menu entry, the menu is not displayed at all.
To change the time-out for the boot menu, use the bcdedit /timeout seconds command, as shown here.
bcdedit /timeout 10
3. The default operating system can be changed in 2 ways-
Note - This only applies to a system having Windows OSs only . For a machine having Ubuntu and Windows OSs , to set a Windows OS as the default OS boot files of GRUB2/LILO have to be configured.
ONE:Go to Control Panel Home (Start -> Control Panel) -> System and Maintenance -> System.
On the left side pane, under the Tasks, Click Advanced System Settings.
Click Settings under Startup and Recovery.
Under System startup, you can change the Default operating system between Windows 7 and Vista. If you have installed any other OS, you can change between those settings as well.
TWO:To change the default operating system entry through command line interface, first run the following command to view the existing entries and make note of the identifier for the entry that you want to be the default.
bcdedit /enum
Then run the following command to set a new default (where is the identifier for the new entry).
bcdedit /default
4.To change the order of Boot Manager menu items, use the bcdedit /display command, and then list the menu item identifiers in the desired sequence .
Bcdedit.exe /displayorder {ID-OS(1)} {ID-OS(2)}
5.Creating another entry for an OS
The following link can be referred to understand how to create another entry for an OS
Typically, one does not need to remove entries from the BCD registry file. Instead, you should simply remove entries from the Windows Boot Manager menu. To remove an entry from the menu, first run bcdedit /enum and note the boot entry's identifier. Then run the following command, substituting the identifier.
bcdedit /displayorder {ID} /remove
For example, to remove the entry to load the previous version of Windows from the boot menu, you would run this command.
bcdedit /displayorder {ntldr} /remove
You can later re-add the entry to the boot menu by calling the following command.
bcdedit /displayorder {ID} /addlast
An alternate to the bcdedit.exe
EasyBCD:
EasyBCD is a freeware has a number of bootloader-related features that can be used to repair and configure the bootloader. EasyBCD can also load Ubuntu, Linux and Mac OS via chainloading.
It can downloaded from this link- http://download.cnet.com/EasyBCD/3000-2094_4-10556865.html
Boot Manager is Missing - A common boot up error and how to fix it
-Try to restart your PC/ laptop
-Change boot order in bios
Often PC tries to boot from a non bootable cd/dvd ,usb stick which may result in this error message.
-If problem still persists use Windows Startup Repair.
The following link describes in detail on how this tool can be used.
This was one of the most toughest projects we have ever worked on. On many occasions, we found the hard drive unbootable, and had to recover the bootloader, even sometimes reinstall an OS. Many times we thought we were doing something right, but ended up with an unexpected error and we would google it to try to understand and debug it . We were very relieved when it finally worked.
This experience of doing this project was frustrating, but it allowed us to work with intricate details of the system because of which our knowledge of how the computer works, especially the boot sequence, partitions, filesystems and the linux shell grew immensely and we would like to thank Amarjeet Sir wholeheartedly for giving us such a great learning opportunity(And for extending the deadline!)